Adding Clients to Your Drip Email System
Adding Clients to your Drip System Email is a great way to keep in contact with them and keep them engaged with your Redman website with automated emails sent over the course of 30 days.
In This Article
Logging Into Your Redman Workstation
In a previous article, we discussed “How To Login To Your Redman Workstation”. To gain insight on how to “login to your Redman website”, simply follow the steps here.
Adding Clients to Your Drop System Email
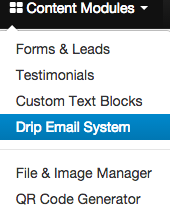
Once you have logged into your Redman Workstation, go to the “Content Modules” menu and click “Drip Email System” from the dropdown.
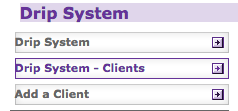
The Drip Email System page will show some links on the left column. Click on the “Drip System – Clients” link.
Then, on the right column, click on the “Non-Drip System Clients” dropdown, and choose from the options in the dropdown menu.

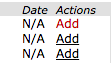
Once selected, you should see the list of the clients you just imported. Then, click on the “Add” link next to the client’s name to add them to the drip email campaign at your discretion.
Note: Selecting “Add a Client” will link you to your “Clients and Leads” area. You are only able to add your Redman clients to the drip system. They must have an account already set-up on your Redman website. To learn how to add a client to your Redman website please see our previous article here.