Adding Testimonials to Your Website
Adding Testimonials to your website is a great way to add credability to your service. Get started adding testimonials to your site by follow the steps below.
In This Article
- Logging Into The Redman Workstation
- Adding a Testimonial
- Adding a Video to a Testimonial
- Adding an Image to a Testimonial
- Viewing Your New Testimonial
Logging Into The Redman Workstation
In a previous article, we discussed “How To Login To Your Redman Workstation”. To gain insight on how to “login to your Redman website”, simply follow the steps here.
Adding a Testimonial
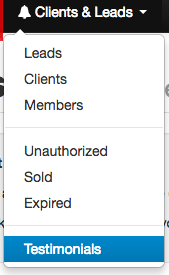
Once you have logged into you Redman Workstation, select “Clients & Leads” from the black navigation bar. This will give you a drop down menu where you can select the last option, “Testimonials”
This will bring you to your “Testimonials” page where you can select the green “+ Add Testimonial” button on the right of the page to add a new testimonial.

Selecting this will make the “Editing” window pop up where you can add the testimonial information.
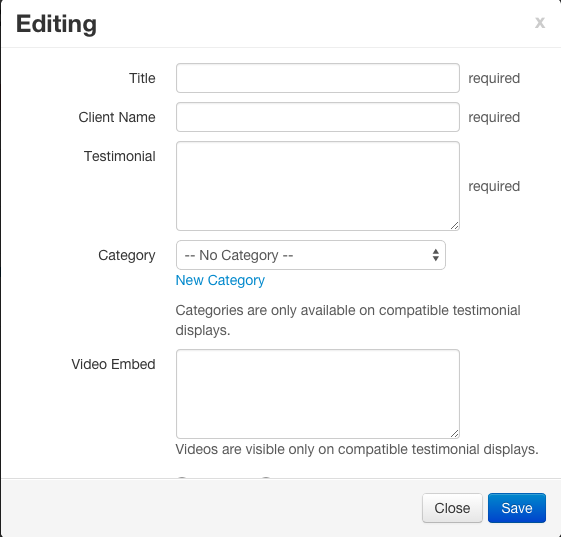
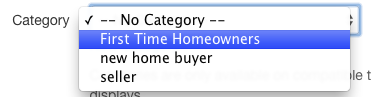
You can select which category to place your testimonial in by selecting “– No Category –” and selecting an option from the drop down menu
or by selecting the “New Category” link to create a new category for your testimonial.
Adding Videos to Your Testimonial
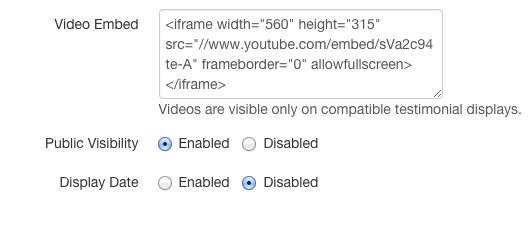
To add a video to your testimonial, simply paste the embed code for the video in the big white “Video Embed” text box.
To learn more about embedding, check out our previous article How do I Embed a Video onto a Page?
Once you have added your testimonial, scroll down on the window to select your “Public Visibility” and “Display Date” options.
These will default to “Disabled” unless you tell the Redman Workstation to do otherwise. Simply Select the grey circle to the left of “Enabled” to make your testimonial public.
Select the blue “Save” button in the bottom right corner of the window to save your testimonial.
![]()
Adding an Image to a Testimonial
Once you have added the testimonial, you can add an image from the “Testimonials” page.
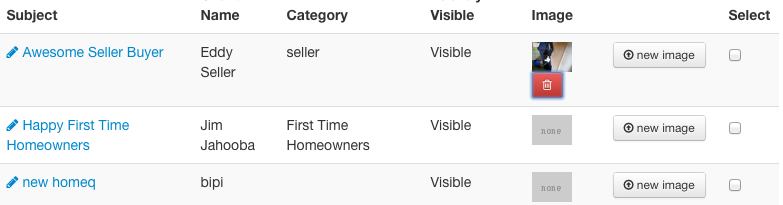
select the grey “new image” button to the right of the testimonial you wish to add an image to.
![]()
Selecting this button will allow you to navigate through your computer to find the image you wish to add.
Once the file has been successfully uploaded, a green “success” box will appear where the “new image” button used to be.
![]()
Viewing Your New Testimonial
To view your testimonials on your website, select the blue “View on Website” button located at the top right of the Testimonials screen.
![]()
Selecting this button will bring you to the testimonials page on the public side of your website where you can veiw all of your current testimonials.