Updating the Team Roster
The team roster is for all the members of your team that are not REALTOR®s. Updating the team roster is fast, simple and a great way to show off all your amazing staff members.
In This Article
- Logging Into Your Redman Workstation
- Navigating to Your Team Roster
- Adding a New Team Member
- Editing a Current Team Member’s Information
- Removing a Team Member from the Roster
Logging Into The Redman Workstation
In a previous article, we discussed “How To Login To Your Redman Workstation”. To gain insight on how to “login to your Redman website”, simply follow the steps here.
Navigating to Your Team Roster
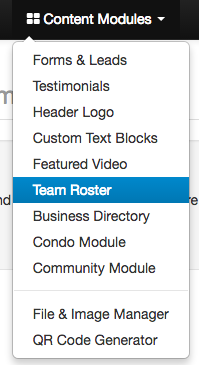
Once you have logged into your Redman Workstation, select “Content Modules” from the black navigation bar that runs along the top of your workstation. This will allow you to choose “Team Roster” from the drop down.
Adding a New Team Member
Selecting “Team Members (Staff)” will bring you to the team management page. To add a new team member select the green “Add Team Member” button located at the top right of the page.![]()
This will open a window where you can add the team member’s personal information.
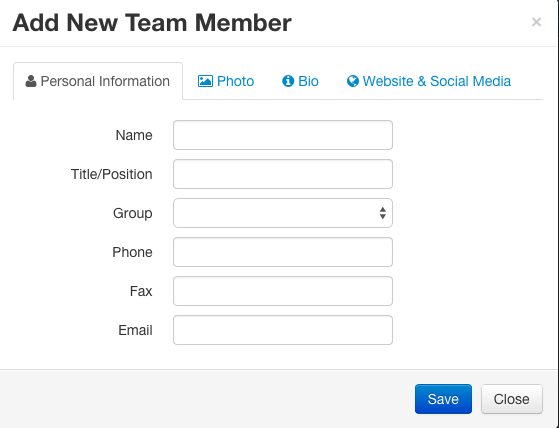
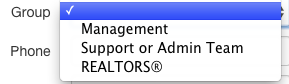
The form can be filled out as you wish the team member to appear on the website. The only optional category you have that may be a little unfamiliar is Group. Here, you can choose from the drop down how you would like the team member to be categorized.
Once you have filled out their personal information, you can select the “Photo” tab along the top of the window to upload a photo of the team member to the site.
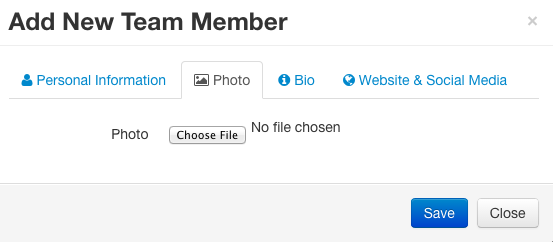
Check out our previous Knowledgebase article on What is the Ideal Image Size for Team Module? to find the best image size to upload to your new team member’s profile.
Once you choose an image either from your computer or from the website, you can select the “Bio” tab from along the top of the window.
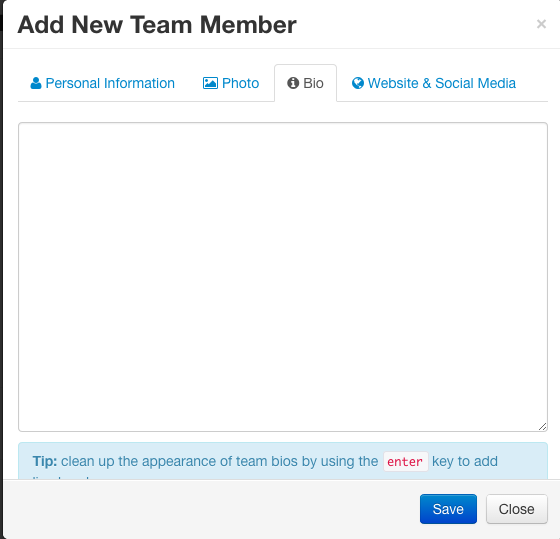
Here you can type in more information about your team member like accreditation or achievements. Include anything personable and catchy that tells users who they are and what makes them unique. This is a WYSIWYG editor so much of the functionality is easily visible, please note it does not allow code or hyperlinks at this time
Once you have updated your new team member’s bio, you can select the “Website & Social Media” tab from along the top of the window.

Here, you can paste the URL that will link to the agent’s various social medias and personal website.
Once you have finished inputting as much information as you would like to include in this agent’s profile, select the blue “Save” button.
![]()
Editing a Current Team Member’s Information
To edit an existing team member’s profile information, navigate to your team roster and select the member you would like to edit. 
This will open a window that operates like the window we previously discussed in the add a new team member portion of this article.
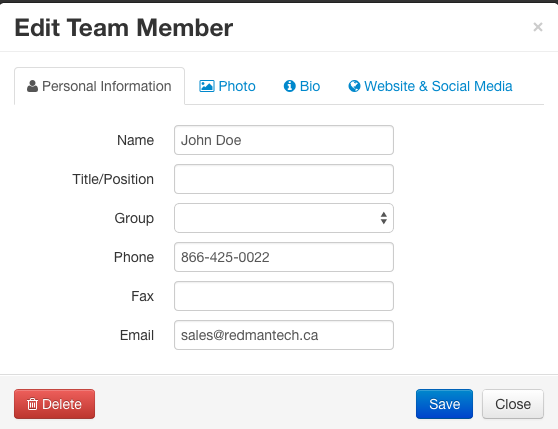
Removing a Team Member from the Roster
To remove a team member from the roster, simply select the red “Delete” button located in the bottom left corner of the Edit Team Member window shown in the image above.
![]()
Excellent! You are now a team roster master!