Adding Members
Members are people who have created a membership on your website, but who you may not be currently working with. These members may be interested in establishing a more formal relationship with you, but have yet to do so.
Memberships will automatically expire after 30 days if you do not convert them to Clients or expand their memberships.
In This Article:
Logging Into Your Redman Workstation
In a previous article, we discussed “How To Login To Your Redman Workstation”. To gain insight on how to “login to your Redman website”, simply follow the steps here.
Adding a Member
After you have logged into your Redman Workstation, select “Clients & Leads” located on the far left of the black navigation bar along the top of the page, close to the red “Redman Workstation” logo.
Selecting “Clients & Leads” will give you a drop down menu. Select “Members” from the drop down menu, it is the third option.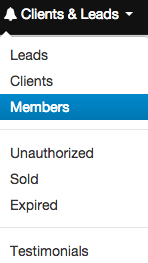
Selecting “Members” from the drop down will bring you to the “Members” page where you can manage all of the guest clients on your site.
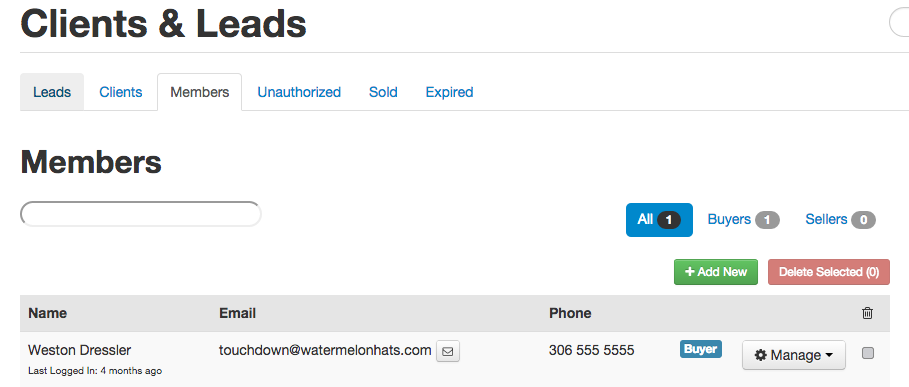
To add a new member, select the green “+ Add New” button.
![]()
This will bring you to the “Add a Client/Member” form where you can fill out the information of the client you would like to add to your site.
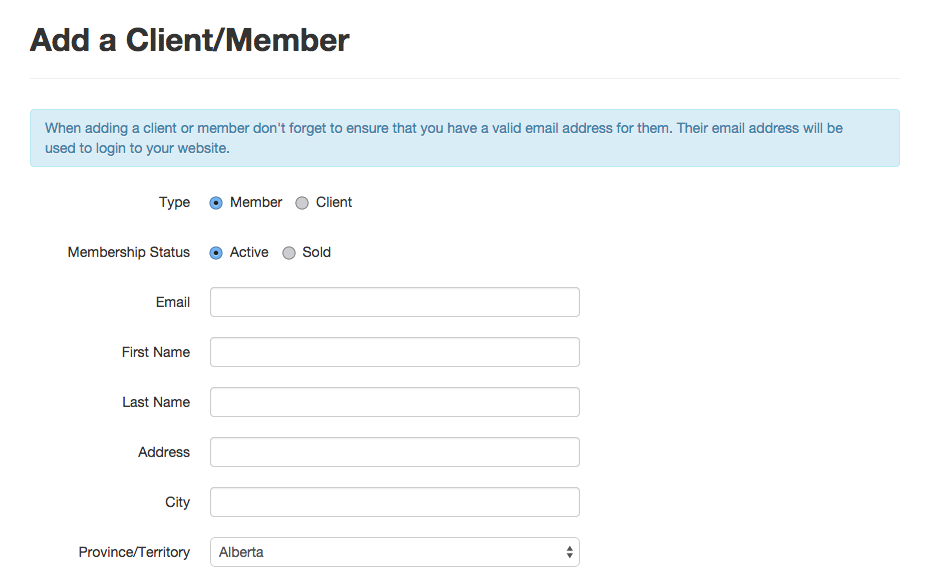
The first option is to choose if you would like this new client to be a “Member” or “Client” of your site. Remember, Members are users of your site you do not interact with regularly and Clients are people who are actively in contact with you.
The second option to choose from is “Active” or “Sold”. Active clients are clients that are looking to buy or sell. Sold clients are clients that still want to use your site but have finished buying or selling.
After you have chosen from the above options, fill out the form options, as best you can, for the new member.
At the bottom of the form, there are a few account specific options that you have available.
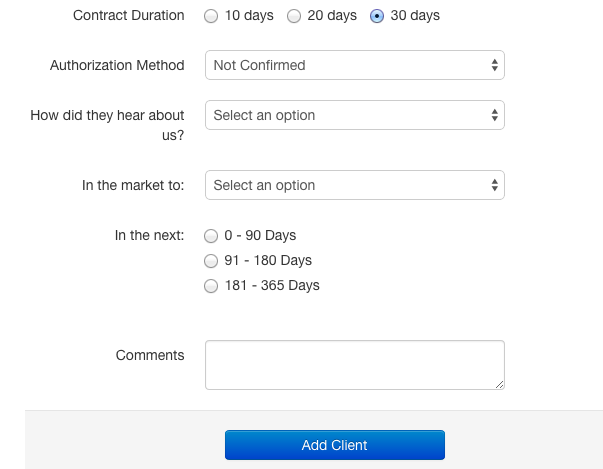
“Contract Duration” gives the option of “10 Days” “20 Days” and “30 Days”. This option gives you the choice to have their website membership last 10, 20 or 30 days.
When “Authorization Method” is set to “Not Confirmed” you can still add the guest, they will just not be able to use the full list of awesome features available on your site until they have been authorized. You can update the options taht appear in the “Authorization Method” dropdown by using your Signup Refferal Options in your Settings Area.
You can Authorize a client over a variety of methods, all of which are listed in a drop down menu when you select “Not Confirmed”

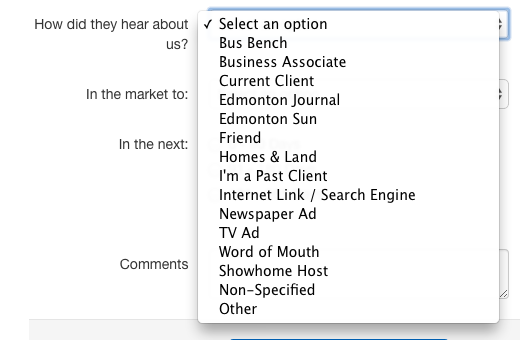
You can also select how this guest heard about you from the drop down menu that appears when you choose “Select an option” to the right of How did they hear about us?
When you select “Select and option” to the right of “In the market to:” you will be given a drop down menu where you can select what your guest is the market to accomplish. This also affects the tabs that are available to you once the client/member has been created on your website.

For Buyers, you will be able to see their save searches, favourited listings and previously used search criteria.
For Sellers, you will be able to connect an MLS listing to their account and correspond through the web site to inform them of the efforts you are making to promote their listing.
You can also select a grey circle to the left of 0 – 90 Days, 91 – 180 Days or 181 – 365 Days to give yourself a time frame for the client. Once one of these options is selected, the grey circle will turn blue with a black dot in the middle.

Finally, you can add notes to the guest profile using the white text box located to the right of the title “Comments”

When you are completely finished adding to your guest profile, you can select the blue “Add Client” button located at the bottom of the form.
![]()
Awesome! You have successfully added a Member to your website.