Editing an Agent’s Information on Your Brokerage Website
As the admin on your brokerage site, you have access to editing agent information on the agent roster. Follow the steps below to learn how.
In This Article
- Logging Into Your Redman Website
- Navigating to the Agent on the Agent Roster
- Editing the Agent Information
- Updating the Agent’s Photo
Logging Into The Redman Workstation
In a previous article, we discussed “How To Login To Your Redman Workstation”. To gain insight on how to “login to your Redman website”, simply follow the steps here.
Navigating to the Agent on the Agent Roster
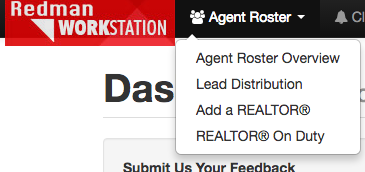
Once you have logged into your Redman Workstation, Select “Agent Roster” from the black navigation bar running along the top of the screen. Select “Agent Roster Overview” from the drop down menu.
This will bring you to a list of REALTORS® you currently employ at your brokerage. From this list, navigate to the agent you wish to edit and select “Edit” from the right side of the agent details.

Editing the Agent Information
To edit their information, simply use the text boxes provided.
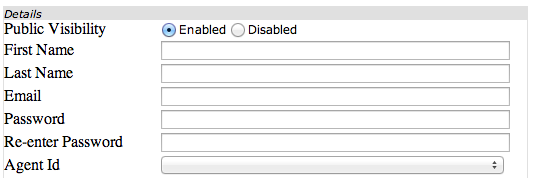
To add their Agent ID, select the box to the right of REALTOR® ID to select from a list of agents. Agents without active listings will not appear on this list. The agent will need to add their ID manually to their profile, for information on how they can “Add their Agent ID to their Profile“ click here.
To add Co-Listing REALTOR®(s) select the REALTOR® that agent is co-listing with from the list provided. To select more than one co-listing REALTOR®, use the control key on your keyboard and select the REALTOR®s names from the list.
You can add links to their social media platforms as well, simply by pasting in the URL in the text box beside the platform they are active on. Example: paste in the URL for their Facebook page in the text box to the right of “Facebook”.
Updating the Agent’s Photo
To update an agents photo, select “Edit” to the left of the agent details
![]()
Once here, you will see a green “Update Photo” button to the left of the agent details.
![]()
This will allow you to upload a new photo by selecting the black “Upload New Photo” button in the middle of the window.

This will allow you to navigate through the photos you currently have on your computer. Once you have found the photo you wish to add and it has successfully uploaded, select the green “Next” button.
Note: You will know the photo has successfully uploaded when you see the new photo when the old photo is replaced by the new one in the window and a notification appears above the green “Next” button advising that the photo has been uploaded successfully.
Once the green “Next” button has been selected, you will be brought to “Select a Crop Area”
You can drag the highlighted box using your mouse and make the are bigger using the small boxes located around the highlighted area. Near the bottom left of the window you can se a “Preview” of the image as it will look on the site under the “Preview” heading. If you would like to go back a step, select the yellow “Back” button.
Once you have highlighted the area you wish the photo to contain, select the green “Next” button.
This will bring you to the final step, simply review the photo and select the green “Save” if you are satisfied.
![]()
This will save the photo to your website. Select the blue “Finish” button to exit the “Photo Uploader Tool”
You can see the updated photo is now located under the green “Upload Photo” on the agent profile.
If, at any time, you wish to exit the “Photo Uploader Tool” select the black “X” at the top left of the window.